How To: Add TLS termination to a gateway
Categories:
This guide will show you how to add TLS and HTTPS to an application with a gateway.
Prerequisites
- rad CLI
- Bicep VSCode extension
- Radius environment
- Domain name + DNS A-record pointing to your Kubernetes cluster
- If running Radius on an Azure Kubernetes Service (AKS) cluster you can optionally use a DNS label to create a DNS A-record pointing to your cluster.
- If running Radius on an Elastic Kubernetes Service (EKS) cluster you can optionally leverage an Application Load Balancer for a hosted DNS name and record.
Step 1: Define a container
Begin by creating a file named app.bicep. Add a container which will be exposed to the internet:
extension radius

@description('The application ID being deployed. Injected automtically by the rad CLI')
param application string

resource frontend 'Applications.Core/containers@2023-10-01-preview' = {
  name: 'frontend'
  properties: {
    application: application
    container: {
      image: 'ghcr.io/radius-project/samples/demo:latest'
      ports: {
        web: {
          containerPort: 3000
        }
      }
    }
  }
}
Step 2: Add a secret store
TLS certificates need to be referenced via a Radius secret store. You can either reference an existing secret, or define a new one with certificate data.
Managing certificates in Kubernetes
cert-manager is a great way to manage certificates in Kubernetes and make them available as a Kubernetes secret. This example uses a Kubernetes secret that was setup by cert-managerresource secretstore 'Applications.Core/secretStores@2023-10-01-preview' = {
name: 'secretstore'
properties: {
application: application
type: 'certificate'
// Reference the existing tls-certificate Kubernetes secret in the default namespace
// Change this if your Kubernetes secret is in a different namespace or is named differently
resource: 'default/tls-certificate'
data: {
// Make the tls.crt and tls.key secrets available to the application
// Change these if your secrets are named differently
'tls.crt': {}
'tls.key': {}
}
}
}
@description('TLS certificate data')
@secure()
param tlscrt string

@description('TLS certificate key')
@secure()
param tlskey string

resource secretstore 'Applications.Core/secretStores@2023-10-01-preview' = {
  name: 'secretstore'
  properties: {
    application: application
    type: 'certificate'
    data: {
      'tls.crt': {
        encoding: 'base64'
        value: tlscrt
      }
      'tls.key': {
        encoding: 'base64'
        value: tlskey
      }
    }
  }
}
Step 3: Add a gateway
Now that your certificate data is ready add a gateway and reference the secret store:
resource gateway 'Applications.Core/gateways@2023-10-01-preview' = {
  name: 'gateway'
  properties: {
    application: application
    hostname: {
      fullyQualifiedHostname: 'YOUR_DOMAIN' // Replace with your domain name.
    }
    tls: {
      certificateFrom: secretstore.id
      minimumProtocolVersion: '1.2'
    }
    routes: [
      {
        path: '/'
        destination: 'http://${frontend.name}:3000'
      }
    ]
  }
}
Step 4: Deploy the application
rad deploy app.bicep -a tlsdemo
rad deploy app.bicep -a tlsdemo -p tlscrt=<base64-encoded TLS certificate> -p tlskey=<base64-encoded TLS certificate private key>
You should see the application deploy successfully, with the public endpoint printed automatically:
Building app.bicep...
   Deploying template './app.bicep' for application 'tlsdemo' and environment 'default' from workspace 'default'...

   Deployment In Progress...

   Completed            gateway         Applications.Core/gateways
   Completed            frontend        Applications.Core/containers
   Completed            secretstore     Applications.Core/secretstores

   Deployment Complete

   Resources:
      gateway         Applications.Core/gateways
      secretstore     Applications.Core/secretstores
      frontend        Applications.Core/containers

    Public endpoint https://MYDOMAIN/
Step 5: Access HTTPS endpoint
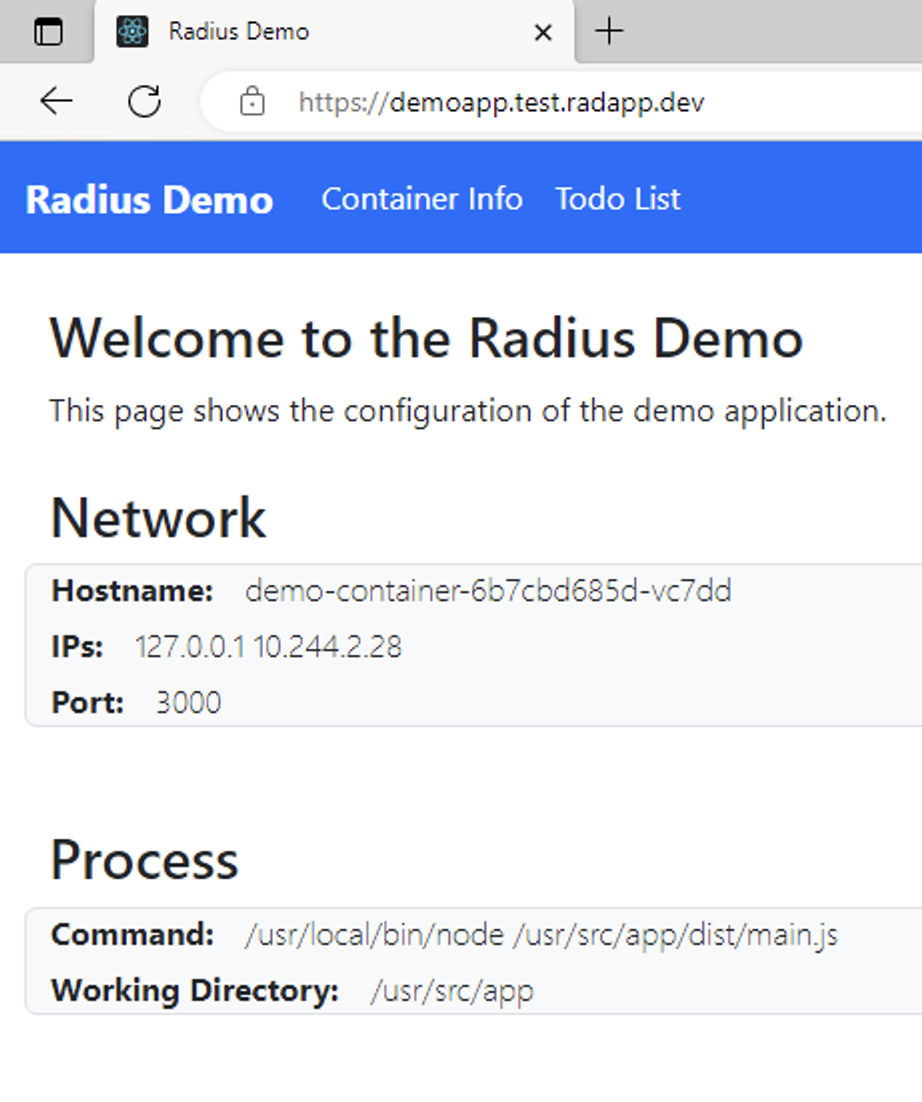
Once the deployment is complete you should see a public endpoint displayed at the end. Navigating to this public endpoint should show you your application that is accessed via HTTPS, assuming that you have a valid TLS certificate:

Done
You’ve successfully deployed an application with TLS termination. Make sure to cleanup your resources:
rad app delete tlsdemo -y
Further reading
Feedback
Was this page helpful?
Glad to hear it! Please feel free to star our repo and join our Discord server to stay up to date with the project.
Sorry to hear that. If you would like to also contribute a suggestion visit and tell us how we can improve.